Blog

  • Hello world!

    Welcome to WordPress. This is your first post. Edit or delete it, then start writing!

  • Makeup Routine for Beginners Step by Step: Easy Everyday Guide

    Makeup Routine for Beginners Step by Step: Easy Everyday Guide

    Learning makeup should not feel complicated. I find it easier to think in four phases: prepare the skin, create an even base, define the eyes and brows, then finish with cheeks and lips. This makeup routine for beginners step by step, keeps each stage simple while explaining why it matters.

    For a US audience dealing with dry winters, humid summers, indoor heating, and air-conditioning, flexibility matters. Your skin type, climate, and preferred finish should guide how much makeup you use.

    How Should Beginners Prepare Their Skin Before Makeup?

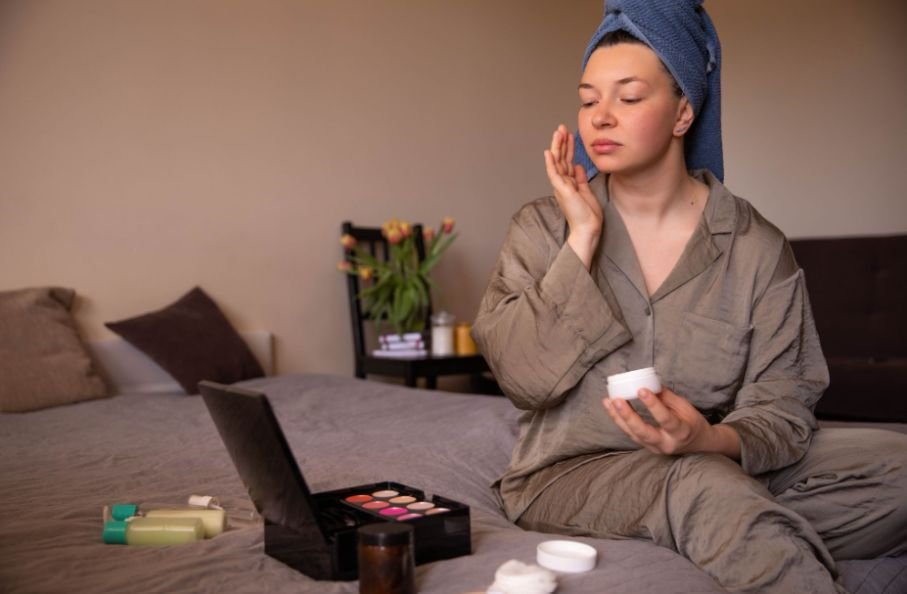
    Step 1: Cleanse and Moisturize

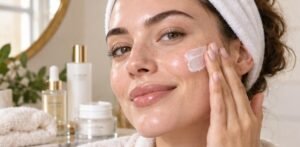
    Start with clean skin, then moisturize. Hydrated skin usually helps makeup spread evenly and reduces dry or patchy areas. Let skincare settle for a few minutes before continuing so the next layers are less likely to pill or slide.

    Step 2: Apply Sunscreen During the Day

    For daytime makeup, apply broad-spectrum sunscreen before makeup and give it time to set. This helps create a stable base while keeping sun protection part of your daily routine.

    Step 3: Use Primer Only Where You Need It

    Primer is optional. I would use it only when it addresses visible pores, excess shine, dryness, or short wear time. A small amount through the T-zone or other problem areas is often enough.

    What Is the Correct Order for a Smooth Makeup Base?

    What Is the Correct Order for a Smooth Makeup Base?

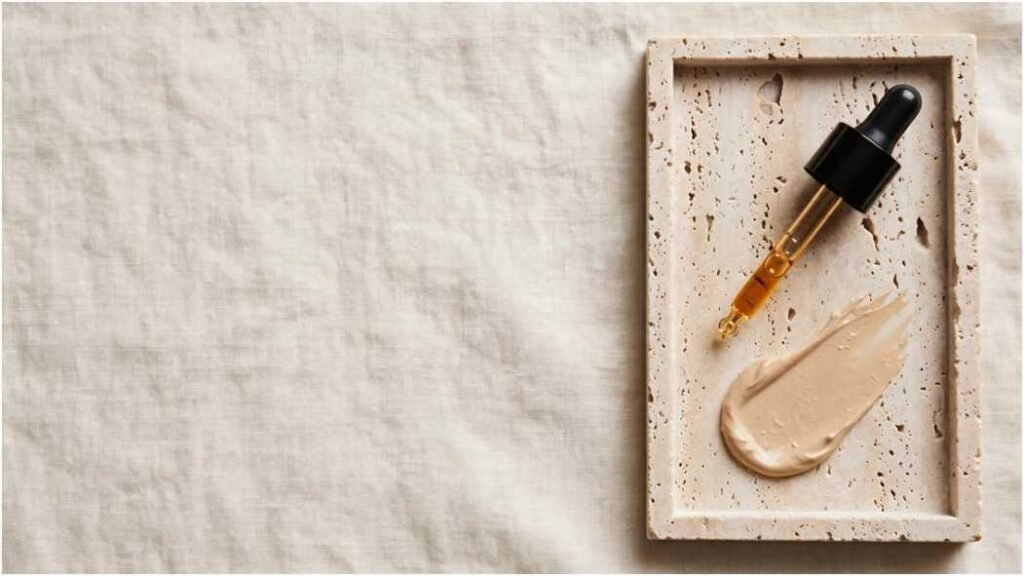
    Step 4: Apply a Light, Even Base

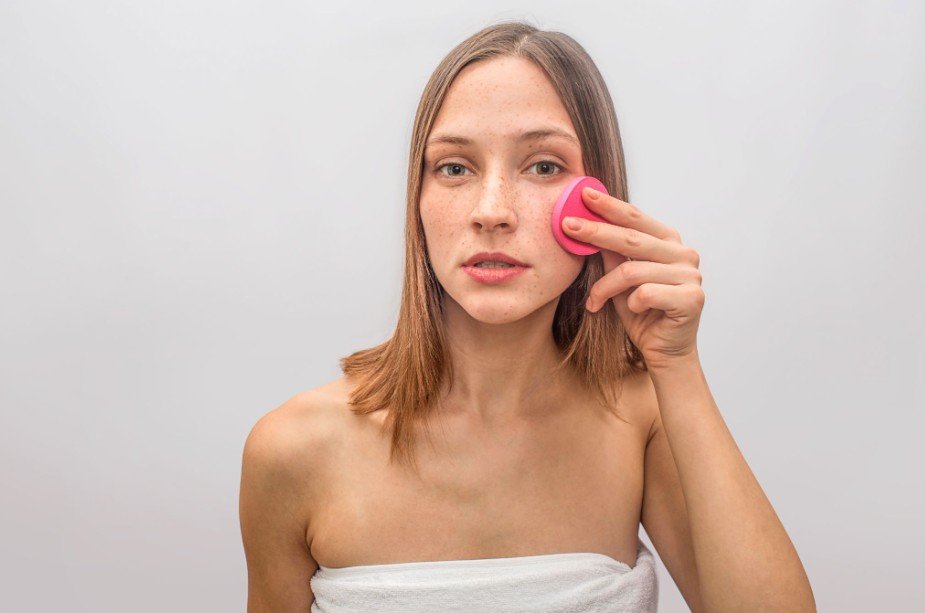
    Start with a small amount of foundation, BB cream, or another light base and blend from the center of the face outward. A damp sponge, clean fingers, or a brush can all work. Build coverage gradually instead of applying a thick layer at once.

    For a natural-looking shade, compare it against your jawline and neck in natural light. Check both depth and undertone so the face does not look noticeably different from the neck.

    Step 5: Apply Concealer After the Base

    I generally apply concealer after foundation because the base may already cover some redness, dark circles, or blemishes. Dab a small amount only where extra coverage remains and tap it into the skin.

    Step 6: Set Only the Areas That Need Powder

    Use a small amount of powder under the eyes or through the T-zone if those areas crease or become shiny. Dry skin may need very little, while oily skin may benefit from slightly more. Too much can make the finish look heavy.

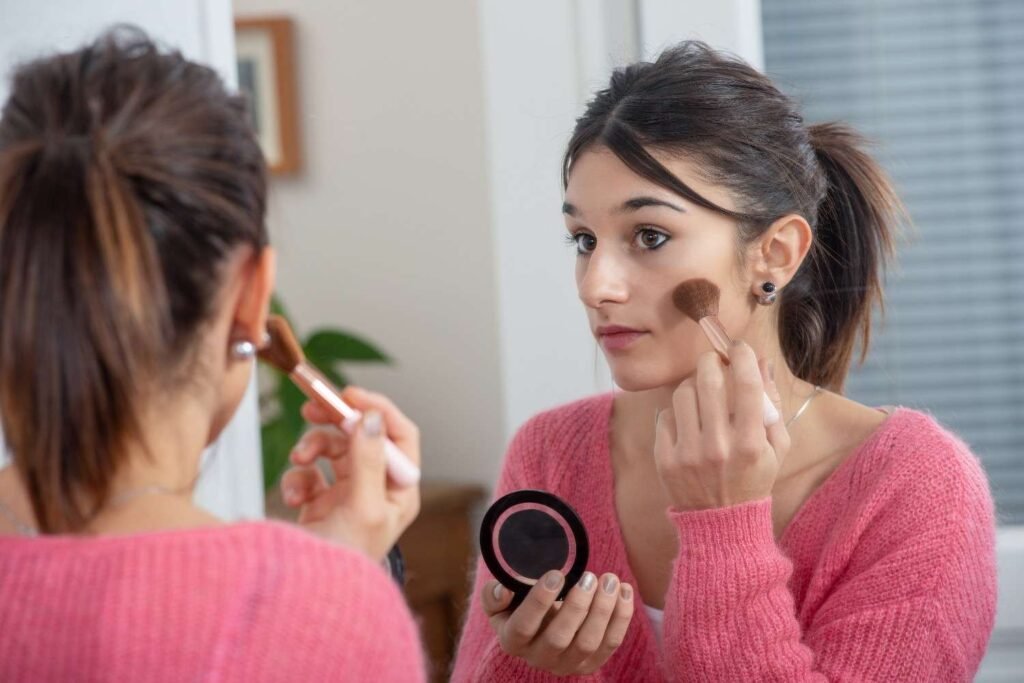
    Step 7: Add Bronzer and Blush Gradually

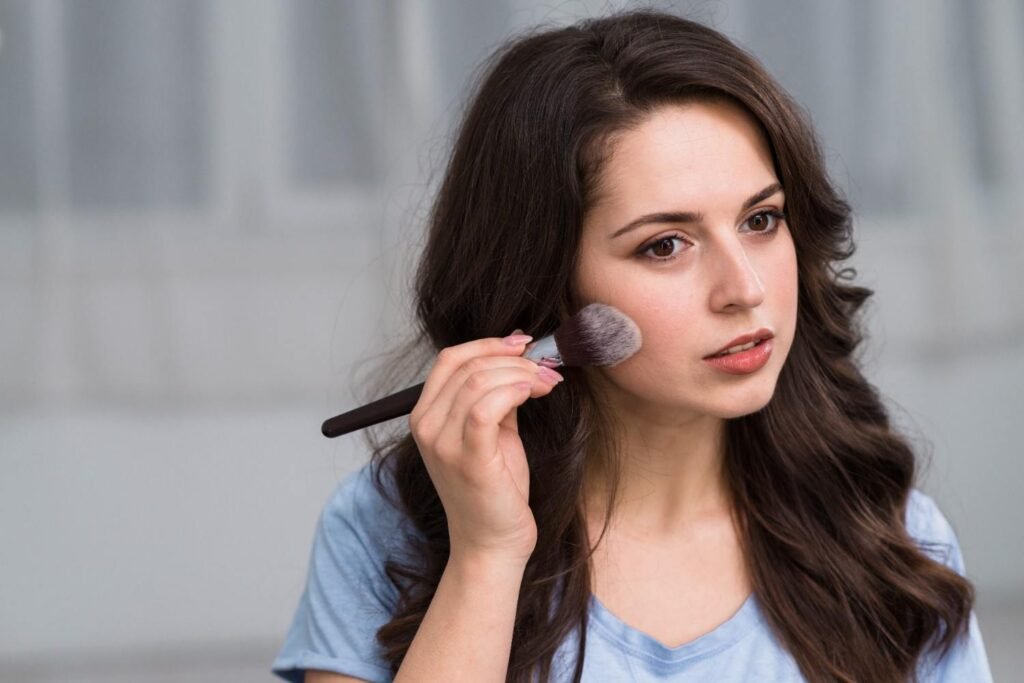
    Sweep bronzer lightly where you want warmth, then add blush for fresh color. I prefer building both slowly because excess pigment is harder to correct. Soft blending matters more than strong color.

    How Can Beginners Make Eye Makeup Look Natural?

    How Can Beginners Make Eye Makeup Look Natural?

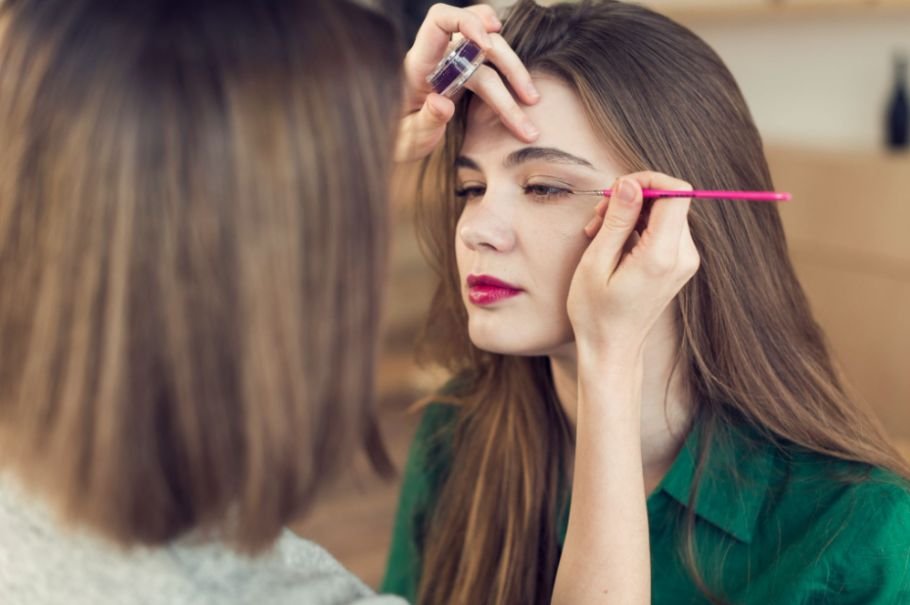
    Step 8: Fill Brows With Light Strokes

    Brush the brows into place and fill only sparse areas. Use short, hair-like strokes rather than creating one solid block of color. Keeping the inner portion softer usually looks more natural.

    Step 9: Keep Eyeshadow Simple

    For everyday makeup, one or two neutral shades are enough. Sweep a soft neutral shade across the lid and blend a slightly deeper shade through the crease if you want more dimension. Blend until there are no obvious lines.

    Step 10: Add Eyeliner and Mascara

    Eyeliner is optional. If you use it, keep it close to the upper lash line. Finish with mascara from the roots toward the tips. One or two light coats usually look cleaner than several heavy layers.

    How Should Beginners Finish the Look?

    Step 11: Keep the Lips Simple

    Choose a comfortable lip finish that suits the look, whether that means sheer color, gloss, or a more defined neutral shade. Softer finishes are usually easier for beginners to apply and maintain.

    Step 12: Use Setting Spray If Needed

    Setting spray is optional. Hold it away from the face, mist lightly, and let it dry naturally. It can help the layers look more blended and may improve wear during long days or warmer weather.

    What Beginner Makeup Mistakes Should You Avoid?

    The biggest mistake I see is applying too much too soon. Thick foundation, heavy concealer, excessive powder, dark brows, and strong blush make blending harder.

    Another mistake is copying someone else’s routine without considering skin type or climate. Makeup that works during a humid Florida summer may need different preparation from makeup worn during a dry Colorado winter.

    Do not rush blending either. Soft edges make complexion makeup, eyeshadow, bronzer, and blush look more polished.

    How Can Beginners Do Makeup in Five Minutes?

    How Can Beginners Do Makeup in Five Minutes?

    When I am short on time, I even out only the areas that need coverage, lightly define the brows and lashes, add a little cheek color, and finish the lips. Choosing the best drugstore makeup products makes this routine affordable, simple, and easy to complete without sacrificing a polished look. This quick routine works well for busy workdays, college mornings, school runs, or casual weekends.

    Frequently Asked Questions (FAQs)

    1. What is the easiest makeup routine for beginners step by step?

    Start with clean, moisturized, sun-protected skin, create a light base, add concealer where needed, set areas that crease, define the brows and eyes, add cheek color, finish the lips, and use setting spray only when useful.

    2. Should concealer go before or after foundation?

    For most beginners, foundation first is easier because it may already cover some discoloration. You can then use less concealer and apply it only where extra coverage is needed.

    3. Do beginners need primer and setting spray?

    No. Both are optional. Use them when they address a real concern such as shine, texture, dryness, or makeup longevity.

    4. Should makeup always be layered from lightest to heaviest?

    Not necessarily. Formula matters. Cream, liquid, and powder textures behave differently, and some people prefer doing eye makeup before their complexion. Think of the standard order as a beginner-friendly framework rather than an unbreakable rule.

    Final Thoughts

    A good beginner routine should make makeup easier, not more intimidating. I recommend learning one technique at a time, keeping layers thin, and adjusting the routine to your skin and environment. Once the basics feel natural, you can experiment with different finishes and levels of definition.

  • Best Makeup Primer for Oily Skin: Control Shine and Pores

    Best Makeup Primer for Oily Skin: Control Shine and Pores

    If my makeup looks smooth at 8 a.m. but starts separating around my nose by lunch, the problem usually isn’t foundation alone. Oily skin needs a base that manages excess sebum without stripping away every trace of moisture. 

    The best makeup primer for oily skin should help reduce shine, smooth visible texture, support longer wear, and sit comfortably over moisturizer and sunscreen.

    Across the US, this matters during hot summers, humid commutes, long workdays, weddings, and outdoor events. The goal is to keep makeup stable without making skin look flat.

    What Type of Primer Is Best for Oily Skin?

    The right primer depends on why your makeup breaks down. If large pores and uneven texture bother you most, a silicone-based primer usually makes sense. If your face feels oily but also tight or dehydrated, a lightweight water- or gel-based formula may feel more comfortable.

    A mattifying primer can help with an oily T-zone, but “more matte” is not always better. Overly drying formulas may emphasize flaky areas and make foundation look patchy.

    Silicone-Based vs. Water/Gel-Based Primer: Which Is Better?

    Silicone-Based vs. Water/Gel-Based Primer: Which Is Better?

    Primer Category Key Benefits Best Suited For Ingredients to Look For
    Silicone-based Smooths the appearance of large pores, fine lines, acne scars, and uneven texture Visible pores and textured skin Dimethicone, silica
    Water/gel-based Provides a lightweight feel and hydration without a heavy finish Dehydrated oily skin, combination skin, and many acne-prone routines Niacinamide; salicylic acid or LHA when appropriate

    Dimethicone can smooth the look of surface texture, while silica can help absorb excess oil. For oily but dehydrated skin, I prefer formulas that balance lightweight hydration with oil control. Niacinamide may support the skin barrier and visible oil balance, while salicylic acid or LHA can suit some acne-focused formulas but may irritate sensitive skin.

    A water- or gel-based texture does not automatically mean a formula is non-comedogenic, so I still check the label if breakouts are a concern.

    What Primer Works Best for Oily Skin With Large Pores?

    For large pores, I would choose a pore-blurring primer instead of relying only on a strong matte finish. A smoothing formula can help foundation apply more evenly.

    Instead of rubbing a thick layer across the face, press a small amount into areas with visible pores, especially around the nose and inner cheeks. This technique can create a smoother appearance while reducing the chance of makeup pilling.

    What Should Acne-Prone Oily Skin Look for in a Primer?

    Acne-prone oily skin usually benefits from lightweight formulas that do not feel greasy or overly occlusive. I look for non-comedogenic labeling and ingredients that fit the rest of my skincare routine.

    Salicylic acid may help with oiliness and clogged pores, but it can also be drying. If I already use acne treatments or exfoliants, I avoid stacking too many active ingredients beneath makeup.

    Oil-free does not automatically mean ideal for every acne-prone complexion, either. I watch for irritation, congestion, and how my skin responds after repeated use.

    How Do I Stop Foundation From Separating on Oily Skin?

    How Do I Stop Foundation From Separating on Oily Skin?

    Primer-foundation compatibility is often overlooked. Silicone-heavy primers often pair more predictably with foundations that use similar base ingredients.

    If foundation pills or separates, I reduce the layers underneath it and let moisturizer and sunscreen settle before primer. I also compare the first several ingredients in both formulas.

    A well-matched primer should create a stable base, not another thick layer that foundation has to fight against.

    How Should I Apply Primer So Makeup Lasts Longer?

    I use about a pea-sized amount for the entire face because more product can actually make makeup slide or pill. I concentrate it on the T-zone—the forehead, nose, and chin—and anywhere pores or shine appear first.

    After application, I let the primer settle for about one minute before applying foundation. This allows the formula to form a more even makeup base instead of immediately mixing with wet foundation.

    I then apply foundation in thin layers and use setting powder mainly where oil tends to break through.

    What Primer Is Best for Hot and Humid US Weather?

    In humid climates and during summer, I prioritize a lightweight oil-control primer with good grip. Heavy layers can increase the chance of foundation separating or feeling uncomfortable.

    This is especially useful in warmer areas of the US where heat, humidity, sweat, and natural oil production can challenge long-lasting makeup.

    For daytime wear, I apply broad-spectrum SPF 30 or higher, let it settle, and then use primer where needed. Primer should support makeup placement rather than replace sun protection.

    Should Oily Skin Use a Matte or Hydrating Primer?

    Choose a matte primer when excess shine is the main issue. Choose a more hydrating or balancing formula when your skin becomes oily but still feels tight, rough, or flaky.

    For combination skin, I prefer an oil-control primer through the T-zone and a lighter formula, or no primer at all, on drier areas.

    This targeted approach can prevent cheeks from looking overly dry while keeping the forehead, nose, and chin under better control.

    Does Primer Help Makeup Last All Day on Oily Skin?

    Does Primer Help Makeup Last All Day on Oily Skin?

    Primer can improve makeup longevity, but I would not expect it to completely stop oil production. The better goal is controlled oil breakthrough and more even foundation wear.

    The best makeup primer for oily skin should keep the base from breaking apart prematurely while still allowing the complexion to look natural. Skincare preparation, foundation compatibility, thin layers, and strategic setting powder also influence how makeup performs over eight or more hours.

    Frequently Asked Questions (FAQs)

    1. Does primer really help oily skin?

    Yes. A well-matched primer can reduce visible shine, smooth texture, improve foundation grip, and help makeup wear more evenly. Skincare and application technique still matter.

    2. Is silicone primer good for acne-prone oily skin?

    It can be. Silicone ingredients can create a smoother surface, but acne-prone skin varies. Look for a non-comedogenic formula and stop using it if irritation or breakouts persist.

    3. How long should primer sit before foundation?

    About one minute is a useful starting point. The goal is to let the primer settle instead of immediately mixing it with foundation while it is still wet.

    4. Can I use primer only on my T-zone?

    Yes. Targeted application can control shine where needed without making normal or dry areas unnecessarily matte.

    Final Thoughts

    I judge primer by what happens several hours later: whether oil breaks through, foundation separates, pores become more obvious, or my skin feels tight. This is especially important when building a makeup routine for beginners, because the primer can influence how every complexion product applies and wears afterward.

    The best makeup primer for oily skin is the formula that matches your main concern—shine, pores, acne-prone skin, dehydration, humidity, or long wear—while working smoothly with the skincare and foundation you already use. For me, balanced oil control, lightweight layers, and smart placement matter more than simply choosing the most aggressively mattifying formula.

  • Makeup for Mature Skin With Large Pores: A Smooth, Fresh Routine

    Makeup for Mature Skin With Large Pores: A Smooth, Fresh Routine

    As my skin has changed with age, I’ve learned that heavier foundation is rarely the answer. The most flattering makeup for mature skin with large pores combines hydration, targeted pore blurring, thin layers, and careful powdering. I want my complexion to look polished without making fine lines or natural texture more obvious.

    Why Do Pores Look Larger on Mature Skin?

    Pores can look more noticeable as skin loses firmness with age. Dryness, oil buildup, and sun damage can also make texture stand out. The American Academy of Dermatology notes that reduced firmness can make pores appear larger and recommends gentle skin care, non-comedogenic products, and daily sun protection.

    Mature skin often has mixed needs. My cheeks may feel dry while my nose and inner cheeks become shiny. Very matte makeup can exaggerate dryness, while an intensely dewy finish may reflect light around pores.

    How Should I Prep Mature Skin Before Makeup?

    I start with gentle cleansing and a lightweight moisturizer with ingredients such as hyaluronic acid, glycerin, ceramides, or squalane. I let it absorb for about five minutes before applying makeup. During the day, I also use broad-spectrum SPF 30 or higher, an important habit year-round across the U.S.

    Should I Exfoliate Before Applying Makeup?

    Should I Exfoliate Before Applying Makeup?

    Gentle exfoliation can help when dead skin makes foundation cling unevenly. If my skin tolerates it, I may use a mild lactic-acid or PHA exfoliant two or three times a week. I avoid harsh scrubbing and cut back if I notice dryness or irritation.

    What Is the Best Primer Technique for Enlarged Pores?

    I do not spread a thick silicone pore filler over my whole face. Instead, I use about a pea-sized amount on the nose, inner cheeks, forehead, or other pore-heavy zones.

    My preferred method is a “press and press” motion. Rather than rubbing, I press the blurring primer into visible pores to create a smoother-looking canvas. If other areas feel dry, I use a hydrating primer there.

    Which Foundation Finish Works Best for Mature Skin and Large Pores?

    Heavy, ultra-matte foundation can cling to texture, while very luminous formulas may highlight enlarged pores. When choosing makeup for mature skin with large pores, I prefer a liquid or serum-style foundation with a natural, satin, or soft-matte finish.

    I use lightweight, buildable coverage and start with the minimum amount needed. A damp beauty sponge works well because stippling helps foundation sit smoothly over texture. A dense brush can also work with light tapping motions. I avoid aggressive circular buffing because it can disturb the primer underneath.

    How Can I Apply Concealer Without Emphasizing Fine Lines?

    I use concealer only where I need it. Under the eyes, I place a small amount near darker areas instead of creating a thick triangle. Hydrating, flexible formulas generally look better on mature skin than very dry ones. If product collects in lines, I remove the excess rather than immediately adding powder.

    How Should I Set Large Pores Without Looking Cakey?

    How Should I Set Large Pores Without Looking Cakey?

    Powder controls shine, but too much can emphasize dryness and fine lines. I prefer finely milled translucent loose powder rather than a heavy pressed compact.

    For pore-heavy areas, I use a “puff press” technique. I pick up a tiny amount with a velvet puff or slightly damp makeup sponge, tap the excess onto the back of my hand, and gently press what remains over the nose and inner cheeks. I leave drier areas mostly unpowdered.

    How Can Blush, Bronzer, and Highlighter Look Smoother?

    Cream or liquid blush and bronzer blend into a lightweight base without adding another heavy layer of powder. I place blush slightly higher on the cheeks and blend upward.

    I use highlighter carefully because strong shimmer directly over enlarged pores can emphasize texture. I keep radiance on smoother areas such as the upper cheekbones.

    What Makeup Mistakes Make Large Pores Look Worse?

    The biggest mistake I avoid is trying to cover texture with more product. Too much primer, heavy foundation, thick concealer, and repeated powder touch-ups can make the complexion look cakey.

    Skipping moisturizer can also backfire. If shine appears during the day, I blot first instead of adding powder directly over oil.

    How Do I Keep My Base Looking Smooth All Day?

    How Do I Keep My Base Looking Smooth All Day?

    I keep every layer thin: moisturized skin, targeted primer, lightweight foundation, spot concealer, and minimal powder. A light setting spray can help the layers look more cohesive.

    In hot or humid U.S. summers, I may use slightly more powder through the T-zone. During dry winters or in air-conditioned spaces, I prioritize hydration and use less.

    Frequently Asked Questions (FAQs)

    1. What Is the Best Makeup for Mature Skin With Large Pores?

    The best makeup for mature skin with large pores usually combines hydrated skin, a targeted pore-blurring primer, a lightweight, buildable foundation, a flexible concealer, and finely milled powder. Natural, satin, and soft-matte finishes often balance shine control with a fresh-looking complexion.

    2. Is Matte or Dewy Foundation Better for Mature Skin?

    Neither extreme works for everyone. Very matte formulas can emphasize dryness, while very dewy formulas may highlight texture. I usually prefer a natural or satin finish.

    3. Why Does Foundation Settle Into My Pores?

    Too much foundation, poor skin prep, incompatible primer and foundation formulas, or aggressive buffing can contribute. Using less product and pressing it into place often helps.

    4. Can Primer Actually Make Large Pores Look Smaller?

    Primer cannot permanently shrink pores, but a smoothing or blurring formula can temporarily make them look less visible. A thin, targeted layer usually works best.

    Final Thoughts

    I get the best results when I stop trying to erase every sign of texture. Skin hydration, targeted primer, thin foundation layers, careful powder placement, and soft cream products create a smoother effect without making my face look masked.

    For me, using less product more intentionally makes the biggest difference. Once I focus on placement and texture instead of maximum coverage, my base looks fresher and more natural.

  • How to Cover Facial Redness Without Heavy Foundation

    How to Cover Facial Redness Without Heavy Foundation

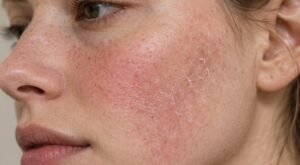
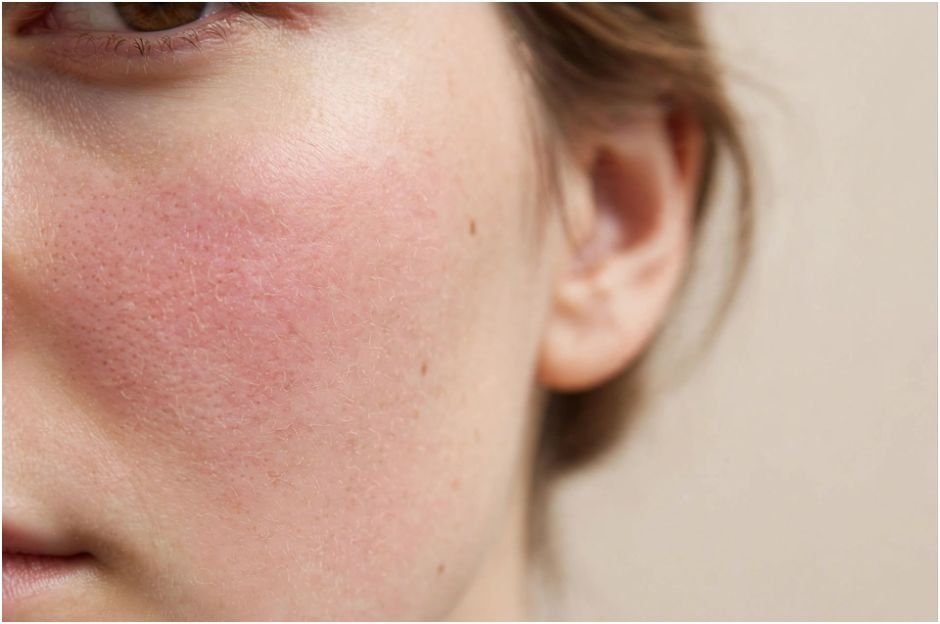
    Facial redness does not mean I need to cover my entire face. I usually get a more natural result when I correct only uneven areas and leave the rest of my skin visible. For me, makeup for redness without full-coverage foundation works best when I combine gentle skin prep, green color correction, spot concealing, and a sheer complexion product only where needed.

    How Do I Prep Redness-Prone Skin Before Makeup?

    I start with a gentle cleanser, moisturizer, and broad-spectrum sunscreen. If skin is dry or irritated, concealer can catch on texture and make redness look more obvious.

    For sensitive or rosacea-prone skin, I avoid rubbing, scrubbing, or aggressive exfoliation before makeup. The American Academy of Dermatology notes that green-tinted concealer can camouflage redness, while the National Rosacea Society recommends minimizing irritation and testing new products carefully.

    Should I Use a Green Primer or a Spot Corrector?

    Should I Use a Green Primer or a Spot Corrector?

    Green sits opposite red on the color wheel, so green-tinted makeup can visually neutralize redness. The right format depends on whether the redness is widespread or concentrated.

    Use a Green Primer for Generalized Redness

    If redness covers a larger area, I use a very thin layer of green primer. Make Up For Ever Step 1 Primer Redness Corrector and e.l.f. Tone Adjusting Face Primer are examples designed to reduce the appearance of redness before complexion makeup.

    Use Concentrated Corrector on Strong Red Spots

    For a red blemish, the creases around my nose, or a flushed patch, I prefer a cream corrector. I tap on the smallest amount, soften it until the green looks almost translucent, then let it settle before adding concealer.

    Color-changing treatments are another option. Products in the Dr. Jart+ Cicapair range start green and blend toward a beige-toned finish.

    Can a Skin Tint or CC Cream Replace Foundation?

    Often, yes. A skin tint, tinted moisturizer, BB cream, or CC cream can soften uneven tone while allowing natural texture to remain visible. Understanding different skin pigmentation types can also help me choose whether I need simple tone-evening coverage or more targeted color correction.

    Cetaphil Redness Relieving Daily Facial Tinted Moisturizer SPF 40 is formulated to neutralize the appearance of redness while providing mineral SPF. Summer Fridays Sheer Skin Tint offers sheer, buildable coverage and is designed to help even skin tone and reduce the look of redness.

    When I want makeup for redness without full-coverage foundation, I look for terms such as sheer, lightweight, buildable, natural finish, and skin-like. If I need slightly more evening, I choose a CC cream but still ap

    How Do I Spot-Conceal Redness So It Looks Natural?

    How Do I Spot-Conceal Redness So It Looks Natural?

    Spot concealing keeps this routine from becoming heavy. I apply my lightweight tint or corrector first, then choose a creamy concealer that closely matches my skin tone.

    Using a small detail brush, I place concealer directly over stubborn redness. I keep the pigment concentrated in the center and blend only the edges with a fingertip, brush, or damp sponge.

    I avoid concealer that is noticeably lighter than my complexion because it can make corrected areas look gray. I also press and tap instead of rubbing, which can lift the corrector underneath.

    This technique works particularly well around the sides of the nose and on individual blemishes because I can maintain coverage exactly where I need it without creating an obvious patch of makeup.

    Which Blush Colors Work Best After Correcting Redness?

    I do not skip blush just because my cheeks naturally flush. Instead, I choose where the color goes.

    Muted peach, soft mauve, warm bronze, and subdued neutral blush shades can add dimension without recreating the red effect I just corrected. I usually keep blush slightly higher on the cheeks rather than concentrating it around the center of the face. This placement can also work well with makeup for combination skin dry, because it lets me add color without overloading areas that may already have uneven texture or excess shine.

    For a natural makeup look, I prefer to build blush slowly. Adding a small amount gives me more control than applying an intense pink or red shade and trying to soften it afterward.

    How Should I Set Makeup Without Making Redness Look Dry?

    I set only the areas that need it. A light dusting of translucent powder around the nose, chin, or oily parts of the T-zone can improve wear without flattening the complexion.

    I avoid over-powdering dry cheeks because powder can emphasize texture. Redness-prone skin is not automatically oily, so I base setting on my actual skin type, heat, perspiration, and wear time.

    This targeted setting method is especially useful during warmer US summers, when makeup around the nose and T-zone may move more quickly while the cheeks remain relatively dry.

    What Mistakes Make Redness-Correcting Makeup Look Cakey?

    What Mistakes Make Redness-Correcting Makeup Look Cakey?

    The biggest mistake is using too much product. Heavy green primer, thick concealer, and several layers can make corrected areas more noticeable than the redness itself.

    Another mistake is trying to make every part of the face the same color. Leaving already-even areas alone usually creates a more believable finish.

    I also pay attention to undertones. A concealer that is too light, pink, or otherwise mismatched can make spot correction more visible rather than less noticeable.

    Persistent redness, burning, swelling, or worsening sensitivity is a reason to speak with a board-certified dermatologist rather than relying only on cosmetic coverage.

    Frequently Asked Questions (FAQs)

    1. Can I cover facial redness using only concealer?

    Yes. If redness is mild or limited to a few areas, a skin-matching concealer may be enough. Apply it directly over the red area and blend only the perimeter.

    2. Does green concealer work without foundation?

    Yes. Green corrector can sit under concealer, tinted moisturizer, or skin tint. Use only enough to neutralize redness without leaving a visible green cast.

    3. What is the best makeup for redness without full coverage foundation?

    I would combine gentle skin prep, targeted green corrector, skin-matching concealer, and an optional sheer skin tint or CC cream. The best combination depends on the intensity of the redness and your skin type.

    4. Can I wear blush over redness-prone skin?

    Yes. Neutralize unwanted redness first, then add blush where you want intentional color. Soft peach, mauve, bronze, or neutral shades can create definition without making the face look overly flushed.

    A More Natural Way to Even Out Redness

    I get my best results when I stop treating facial redness as a reason to cover my whole face. Targeted correction gives me more control and usually looks fresher than an opaque base. For me, getting even skin tone is more about balancing discoloration strategically than hiding every part of my complexion.

    By preparing the skin, using green only where needed, matching concealer carefully, choosing lightweight coverage, and setting selectively, I can create an even-looking complexion that still feels breathable and looks like real skin.

  • Makeup for Hot Humid Weather: 10 Tricks That Actually Last

    Makeup for Hot Humid Weather: 10 Tricks That Actually Last

    A full face can look flawless indoors and start separating within minutes of stepping into a humid summer afternoon. I have found that the solution is not piling on more foundation, powder, or primer. The real secret is creating thinner layers that can handle sweat, oil, and moisture without turning heavy or cakey.

    When I plan makeup for hot, humid weather, I focus on three things: lightweight skin prep, controlled oil absorption, and strategic setting. This approach works especially well during muggy summers in Florida, Texas, Louisiana, Georgia, and other parts of the U.S. where heat and humidity often arrive together.

    Why Does Makeup Melt So Quickly in Hot, Humid Weather?

    Heat encourages sweating, while humid air slows the evaporation of that moisture from your skin. Add natural facial oils, sunscreen, moisturizer, and several makeup layers, and foundation can begin sliding, separating, or collecting around pores and fine lines.

    That is why I treat long-lasting summer makeup differently from an everyday indoor routine. Instead of trying to completely block sweat, I reduce unnecessary layers and choose products that hold up better when moisture appears.

    How Should I Prep My Skin So Makeup Does Not Melt?

    Choose Lightweight Moisturizer and Sunscreen

    I never skip hydration just because the forecast is hot. Instead, I replace thick creams with lightweight gel moisturizers or fast-absorbing lotions. This is one of the simplest summer skin care adjustments I make because it helps maintain hydration without leaving my skin feeling heavy or greasy.

    Sunscreen is equally important during summer. I prefer a lightweight fluid, gel, or natural-matte SPF that settles comfortably before makeup. Rich, highly emollient formulas can leave a slippery surface that makes foundation more likely to move.

    I let moisturizer and sunscreen absorb before starting my makeup rather than immediately layering products on top.

    Use Mattifying Primer Only Where You Need It

    Use Mattifying Primer Only Where You Need It

    Applying mattifying primer across the entire face can make dry areas look flat or textured. I concentrate oil-control primer around my forehead, nose, chin, and other places where makeup usually breaks apart first.

    A pore-blurring or sweat-resistant primer can also help create a smoother base, but I keep the layer thin.

    Does the Powder-Before-Foundation Trick Work?

    It can, especially for oily or combination skin in extreme humidity.

    After primer, I sometimes press an almost invisible layer of micro-fine translucent setting powder onto my T-zone before foundation. The idea is to create an extra oil-absorbing layer underneath the base.

    The key word is “light.” Too much powder under foundation can make dry skin look textured or cause the base to grab unevenly. I would skip this technique on dry areas and reserve it for places that become oily quickly.

    What Foundation Lasts Best in Humid Summer Weather?

    Heavy coverage is not always longer-lasting coverage.

    I usually choose an oil-free skin tint, lightweight matte foundation, tinted moisturizer, or transfer-resistant foundation. Then I apply the smallest amount needed to even my complexion.

    Instead of spreading a thick layer everywhere, I work in thin layers and build coverage only where necessary. A damp makeup sponge works well because I can press the product into my skin instead of moving it around.

    For especially hot days, spot concealing can work even better. I use high-coverage, water-resistant concealer under my eyes, around redness, or over blemishes while leaving areas of clear skin uncovered.

    Which Blush and Bronzer Formulas Survive Humidity?

    Traditional powder products can sometimes look cakey when they mix with sweat, while rich creams may become greasy.

    I prefer lightweight liquid blush, gel cheek stains, or thin cream formulas during humid weather. These products can create natural-looking color without adding a thick layer.

    If I want more staying power, I lightly set a liquid blush or bronzer with a coordinating powder product. Using a tiny amount of each usually lasts better than applying one heavy layer.

    How Can I Stop Eye Makeup and Brows From Smudging?

    How Can I Stop Eye Makeup and Brows From Smudging?

    Humidity can make eyelids oily enough to break down eyeshadow, eyeliner, and mascara.

    I use an oil-controlling eye primer even when I am wearing minimal shadow. It gives eyeliner and mascara less opportunity to transfer onto my lids.

    Waterproof mascara and long-wear gel or liquid eyeliner usually perform better during sweaty outdoor days. Tubing mascara is another option for people who regularly deal with mascara transfer.

    Brows deserve similar attention. After filling them in, I set the hairs with a clear water-resistant brow gel or brow wax so the shape stays cleaner throughout the day.

    What Lip Makeup Works Best When It Is Hot Outside?

    Heavy lipstick and sticky gloss can feel uncomfortable when temperatures rise.

    I prefer lip stains, long-wear lip colors, or a matte lip liner blended across the lips. A small amount of balm can add comfort without creating a thick, slippery finish.

    If I expect to spend significant time outdoors, I also look for a lip balm or lip product with SPF.

    Should You Press or Sweep Setting Powder?

    In humid conditions, I prefer pressing.

    After applying my liquid products, I use a powder puff or damp sponge to gently press translucent powder onto oil-prone areas. Sweeping aggressively with a brush can disturb foundation and concealer underneath.

    I pay particular attention to the sides of my nose, forehead, chin, and areas where concealer creases.

    More powder is not necessarily better. A light application usually looks smoother once natural oils begin appearing later in the day.

    Does the Sandwich Setting Spray Technique Help Makeup Last?

    The sandwich method adds setting spray at several stages rather than relying only on one final mist.

    For particularly humid days, I may apply a light layer of long-wear setting spray after primer, another fine mist after my liquid complexion products, and a final layer once powder makeup is finished.

    I allow each mist to dry before continuing.

    This technique can improve durability, but I keep every layer light. Saturating the face with setting spray can defeat the purpose, especially if the formula leaves the skin overly wet.

    How Do You Touch Up Sweaty Makeup Without Making It Cakey?

    How Do You Touch Up Sweaty Makeup Without Making It Cakey?

    This is where many otherwise good routines go wrong.

    I never immediately powder visibly sweaty skin. Powder mixed with moisture and facial oil can form a thick, uneven layer.

    Instead, I gently press blotting paper or a clean tissue against shiny areas. I avoid rubbing because wiping can remove foundation.

    Once my skin feels dry, I decide whether I actually need more product. Often, blotting alone improves the finish. If shine remains, I press a small amount of compact powder onto the T-zone.

    If foundation has disappeared around my nose or another small area, I use a tiny amount of concealer rather than applying another full layer of foundation.

    What Are the Biggest Hot-Weather Makeup Mistakes?

    The mistake I see most often is assuming more product means better staying power. Thick moisturizer, heavy primer, full-coverage foundation, concealer, loose powder, pressed powder, and several sprays can become difficult for the skin to hold once sweating starts.

    Another mistake is trying to make every inch of the face completely matte. Skin naturally develops some shine, especially during a U.S. summer heat wave. Strategic oil control usually looks more natural than repeatedly covering the entire face with powder.

    It is also important to remember that waterproof and sweat-resistant do not necessarily mean the same thing. I check product claims and choose long-wear formulas based on where I need the most protection.

    Frequently Asked Questions (FAQs)

    1. What type of makeup is best for very humid weather?

    Lightweight, oil-free, transfer-resistant, and water-resistant products are usually the easiest to manage. Use thin foundation layers, strategic translucent powder, waterproof eye products, and long-wear setting spray rather than relying on a thick base.

    2. How do I keep foundation from separating when I sweat?

    Let skincare and sunscreen settle before makeup, avoid heavy layers, and control oil mainly around the T-zone. When sweat appears, blot it gently before applying any additional powder.

    3. Should I use cream or powder makeup in summer?

    Both can work. I prefer lightweight liquids, gels, and thin creams for cheek color, then use a small amount of powder only when I need extra staying power. The best choice ultimately depends on your skin type.

    4. Is setting spray or setting powder better for humidity?

    They perform different jobs. Powder helps absorb oil and reduce shine, while setting spray helps improve overall makeup wear. Using small amounts of both usually works better than heavily applying either one.

    My Final Approach to a Fresh Summer Makeup Look

    I no longer expect summer makeup to remain completely untouched from morning to night. Instead, I build a routine that can handle real-world conditions, whether that means commuting through a humid New York afternoon, attending an outdoor wedding in Atlanta, or spending a summer weekend along the Gulf Coast.

    My approach to makeup for hot, humid weather is simple: let skincare settle, keep complexion products thin, control oil only where necessary, press rather than sweep powder, waterproof the areas most likely to smudge, and blot before touching up. Choosing the best drugstore makeup products with lightweight, long-wearing formulas can also help create a reliable summer routine without requiring a high-end budget.

    When every layer has a purpose, makeup feels lighter and looks fresher. You do not need to fight summer weather with more makeup. In most cases, using less product more strategically is what helps your look survive the heat.

  • Makeup for Combination Skin: Dry Patches, Oily T-Zone Tips

    Makeup for Combination Skin: Dry Patches, Oily T-Zone Tips

    If your foundation looks smooth on your cheeks but starts breaking apart around your nose by lunchtime, you are dealing with one of the most frustrating makeup challenges. I have found that the secret to makeup for combination skin, dry patches, and oily T-zone concerns is not choosing between a completely matte or completely hydrating routine. It is learning to treat different parts of the face differently.

    I prefer a zone-mapping approach. Dry cheeks and flaky patches need moisture and flexible formulas, while the forehead, nose, and chin usually need lighter hydration, oil control, and strategic powder. When these two needs are balanced, makeup looks smoother and lasts much longer.

    How Should I Prep Combination Skin Before Makeup?

    A smooth base starts with skincare. If dry patches are rough or flaky, foundation will often grab onto them regardless of how expensive the formula is.

    I begin with a gentle cleanser that removes excess oil without leaving my face tight. If loose flakes are visible, I avoid aggressive scrubbing immediately before makeup. Instead, I soften the area with moisturizer and remove only loose skin very gently. Regular mild exfoliation within a skin care routine is usually more effective than trying to scrub texture away right before foundation.

    Next, I use different hydration levels across the face. On dry cheeks and around the jawline, a richer moisturizer or hydrating serum containing ingredients such as hyaluronic acid, glycerin, ceramides, or squalane can help create a smoother surface.

    Across the T-zone, I prefer a lightweight oil-free gel or lotion. This gives the skin hydration without creating a heavy layer underneath foundation.

    After skincare, I wait about two to three minutes so everything can settle. Applying primer or foundation while moisturizer is still slippery can make makeup separate faster.

    What Is Multi-Priming for Combination Skin

    Multi-priming simply means using different primers where different problems occur.

    I would not apply a strong mattifying primer over my entire face because it can make dehydrated patches look more obvious. At the same time, using a highly dewy primer everywhere may make an already oily T-zone break down faster.

    What Primer Should I Use on an Oily T-Zone?

    What Primer Should I Use on an Oily T-Zone?

    On the forehead, nose, sides of the nose, and chin, I use a small amount of pore-blurring or mattifying primer.

    Pressing it gently into the skin rather than rubbing a thick layer over the area can create a smoother surface while giving foundation more grip.

    What Primer Works Best on Dry Patches?

    On dry cheeks or areas where foundation usually catches, I prefer a hydrating or lightweight gripping primer.

    This is the foundation of zone-mapping: each part of the face receives only what it actually needs.

    What Foundation Is Best for Combination Skin?

    Natural, satin, and soft-matte foundations usually provide the best middle ground.

    An extremely matte foundation can absorb too much moisture and exaggerate flakes. On the other hand, a very luminous foundation may become overly shiny as oil builds throughout the day.

    For makeup for combination skin with dry patches oily T-zone, I prefer a lightweight, buildable foundation rather than thick full coverage from the start.

    Apply a thin layer first and add coverage only where you need it. This prevents excess product from collecting around textured areas while reducing the chance of foundation sliding away from oily areas.

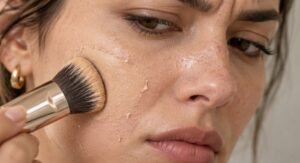
    How Do I Apply Foundation Without Highlighting Dry Patches?

    Technique matters almost as much as foundation formula. Before application, I make sure to moisturise your skin properly so dry areas are softer and less likely to catch excess pigment.

    On dry areas, I like to press foundation into the skin using a damp makeup sponge. Aggressive buffing with a dense brush can sometimes disturb flaky texture and make it more noticeable.

    Start around the center of the face and blend outward. Your cheeks may not need the same amount of product as your nose or areas with redness.

    If a dry patch remains visible, adding more foundation usually does not solve the problem. More layers can make the texture look thicker and cakier.

    How Do I Stop Foundation From Separating Around My Nose?

    How Do I Stop Foundation From Separating Around My Nose?

    The nose is one of the first areas where combination-skin makeup tends to fail.

    Too much moisturizer, too much primer, thick foundation, and natural oil production can all contribute to separation.

    I keep skincare thin around the nose, use only a small amount of mattifying primer, and apply a very light foundation layer. If I need additional coverage around redness, I use concealer only where needed instead of applying another full coat of foundation.

    This keeps the area lighter and makes touch-ups easier later.

    Should I Powder My Entire Face?

    I rarely recommend powdering the entire face when dry patches are part of the problem.

    Instead, I use selective setting.

    A small fluffy brush gives much better control than a large powder brush. I lightly apply loose translucent powder over the forehead, nose, sides of the nose, chin, and anywhere else that consistently becomes oily.

    I leave dry cheeks mostly powder-free.

    This keeps shine controlled without taking away the natural softness and hydration that dry areas need.

    Does Setting Spray Help Combination Skin?

    A setting spray can help the different textures of your makeup look more unified.

    After strategically powdering the T-zone, I lightly mist the face with a hydrating or continuous setting spray. This can soften the visible powder finish and help makeup look more skin-like.

    Avoid saturating the face. A light, even mist is enough.

    How Can I Stop My Makeup Getting Cakey During the Day?

    One of the biggest mistakes I see is repeatedly adding powder whenever shine appears.

    If your forehead or nose gets oily during the afternoon, blot the excess oil first. Blotting papers or a clean tissue can remove surface oil without adding another makeup layer.

    Only then should you apply a tiny amount of powder if necessary.

    Applying powder directly over a greasy surface can create buildup that looks thick and uneven.

    What Blush and Bronzer Work Best on Dry Cheeks?

    Cream and liquid complexion products can work particularly well on areas that feel dry.

    I often prefer cream blush or lightweight liquid bronzer because these formulas add color without requiring several layers of powder.

    Press the product into foundation rather than dragging it across the skin. This reduces the chance of lifting the foundation underneath.

    Powder blush can still work, but avoid heavily setting dry cheeks before applying it.

    How Should I Adjust Combination-Skin Makeup by Season?

    Combination skin often changes with the weather.

    During hot, humid summers in places such as Florida, Texas, or much of the Southeast, oil production and shine may become more noticeable. Lighter moisturizers, targeted mattifying primer, thin foundation layers, and strategic powdering can help.

    Cold winters and indoor heating can create the opposite problem, especially in northern parts of the US. Dry patches may become more visible, so I increase hydration around my cheeks while keeping oil-control products limited to the T-zone.

    You do not necessarily need an entirely new makeup collection for every season. Often, changing the amount and placement of skincare, primer, and powder is enough.

    Common Mistakes That Make Combination Skin Look Worse

    Common Mistakes That Make Combination Skin Look Worse

    The biggest mistake is treating combination skin as completely oily simply because the nose and forehead become shiny.

    Skipping moisturizer can also backfire because oily skin can still be dehydrated.

    Another mistake is applying too many layers. Heavy moisturizer, primer, foundation, concealer, and powder can create pilling or separation rather than a smoother finish. This is also an important consideration when applying makeup for mature skin with large pores, where excess product can settle into texture and make pores appear more noticeable.

    The better strategy is controlled layering. Use enough product to solve the problem without covering every part of the face equally.

    Frequently Asked Questions (FAQs)

    1. What is the best makeup for combination skin, dry patches oily T-zone?

    The best routine uses lightweight hydration on oily areas, richer moisture on dry areas, multi-priming, a natural or satin-finish foundation, and selective powdering. Treating each facial zone differently usually creates a smoother and longer-lasting base.

    2. Should combination skin use matte or dewy foundation?

    A natural, satin, or soft-matte finish is usually easier to manage. Very matte formulas may exaggerate flakes, while highly dewy formulas can become too shiny around the T-zone.

    3. Why does foundation cling to dry patches but slide off my nose?

    Dry patches can create uneven texture that catches foundation, while excess oil around the nose can break makeup down. Zone-specific skincare, primer, and powder can address both problems.

    4. Can I use two different primers on my face?

    Yes. Using a mattifying or pore-blurring primer on oily areas and a hydrating primer on dry areas is one of the most practical ways to manage combination skin.

    A More Balanced Way to Build Your Base

    I have found that combination-skin makeup becomes much easier when I stop trying to make my entire face behave the same way. Knowing your skin type and understanding how different areas of your face behave can make product selection and application much more effective. My cheeks may need extra hydration, while my nose may need oil control. There is no reason to treat both areas identically.

    The most reliable routine is simple: hydrate strategically, use multi-priming, apply thin foundation layers, powder only oily areas, finish with setting spray, and blot before touching up.

    Once you start treating your face according to its individual zones, you can achieve a smoother, more natural-looking base without choosing between flaky cheeks and a shiny T-zone.